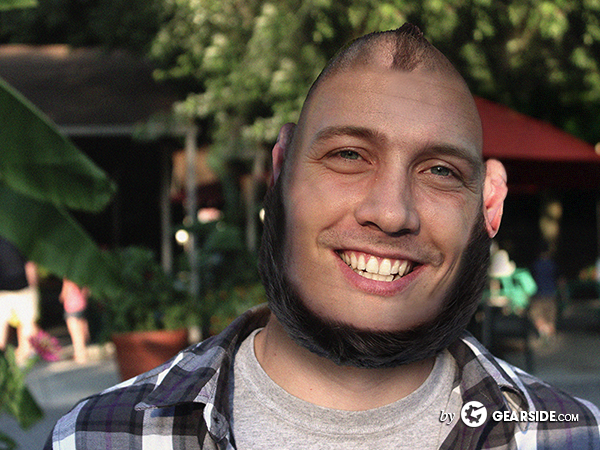
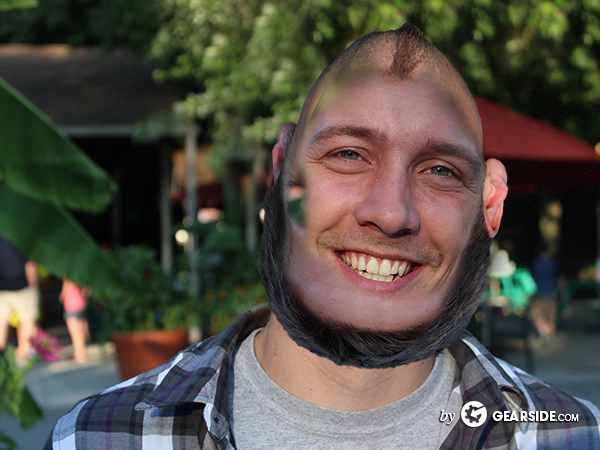
Let’s get entirely ridiculous! Want to confuse your friends or just make celebrities look funny? Follow this easy tutorial and you’ll be turning heads in no time. Who says you can’t have fun while brushing up on your selections, layer masks, and clone stamp tool? In this funny looking Photoshop tutorial those will be the keys to making a successful “headflip”.
Step One
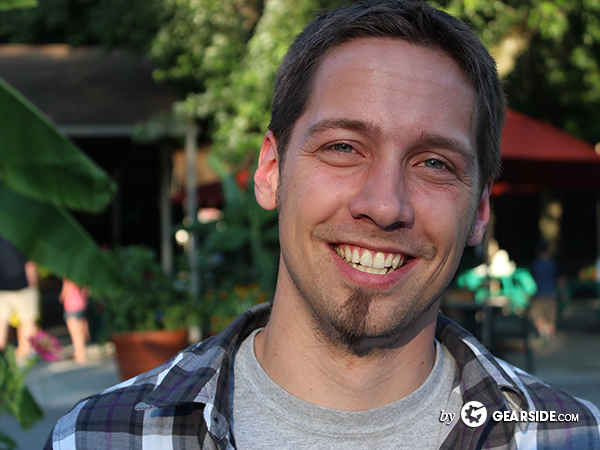
Start with a photo in a relatively light-neutral place; outdoors works well. Basically, you don’t want any harsh shadows on either side of the head. I’m using this shot of my brother who doesn’t know what he has actually signed up for.
Step Two
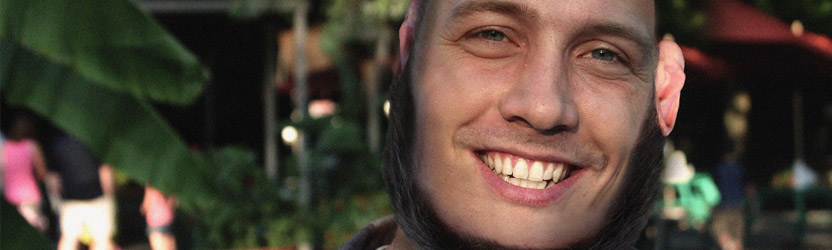
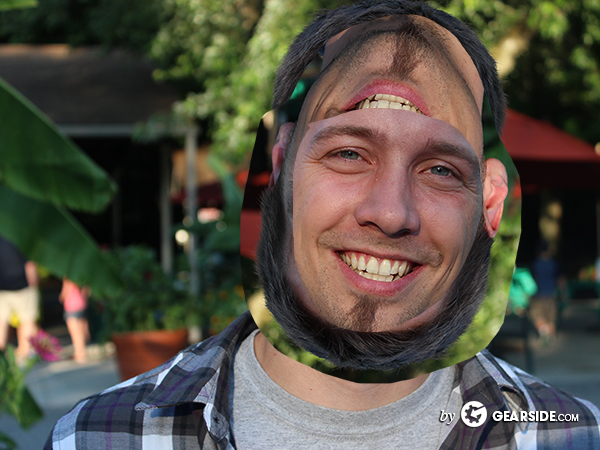
Using the lasso tool, make a quick and dirty selection around your subject’s entire head. Then transform it by rotating 180°. Hide that layer and now select the subject’s facial area and copy and paste that on it’s own layer as well on top of everything. You should now have three layers (Background, Head, Face).
Step Three
Mask around both the head (using as hard of an edge as possible) and the face (using a soft edge). I would strongly recommend using layer masks and making non-destructive edits! Next, duplicate your background layer and using a big soft clone stamp, cover up the outer edges of the original head. We’re doing this because the chin will be much more narrow than the forehead, so the background will need to show through. If you get gaps inside the head, that’s perfectly fine.
Step Four
Get as far as you can with the clone stamp. You will most likely need to eventually copy/paste broad areas (the forehead is a great spot as well as the neck too) to cover/blend further. Sometimes it’s beneficial to turn off the face layer, and just cover the head as if you were making a faceless person. Then turn the face layer back on and adjust the mask as needed.
Step Five
Copy/Paste/Stamp/Move your layers as much as you can to get everything to blend smoothly. You may need to do some color correcting to get parts of the face to match parts of the head that it didn’t used to be next to or on top of. I recommend using adjustment layers (again, non-destructive editing!). Another great trick is to use the luminosity blending mode (on the above layer) for color matching. Just be careful, because you’ll want to create a duplicate layer for non-skin tones (like eyes, lips, teeth) as everything will lose its color information.
Step Six
Double check your mask around the head- particularly where the hair (that used to be on top) overlaps the neck of your subject. Make sure there are not fragments from the background sticking through! Add a nice dark shadow under your subject’s new beard (or “shaved” chin if they were bald).
Now let’s add some elements to help subdue any flaws your ‘shop may have. First add some shadows. If you have a photo that did have a dominant light source, add some shadows to the original shaded side to help the upside-down head look a little more natural. Make this a very subtle touch (my shadow layer has an opacity of 8%). Next, add some adjustment layers. I like to use Levels to push the highlights/shadows, then Vibrance to pull back both the vibrance/saturation slightly to limit color balancing, and then add a Photo Filter with a color close to the skin-tone of the subject.
Step Seven
By now you should have an image you’re happy with. At this point I like to double check the clone stamp layers, and even walk away from the image for a while and come back to see if there is anything weird going on at first glance with a fresh set of eyes. You could apply a slight amount of the Add Noise filter to further eleviate some not-so-good looking areas if you have any. Once you get better and better at these techniques, you’ll be able to churn out headflip after headflip to shock and confuse your friends!
Keep at it and comment below with your finished images!